Monday, October 24, 2011

Art Room Project - Begin the Finish

This is the eleventh post in my Art Room Project series. Find the Table of Contents at the first post, Getting Started.

The Finish

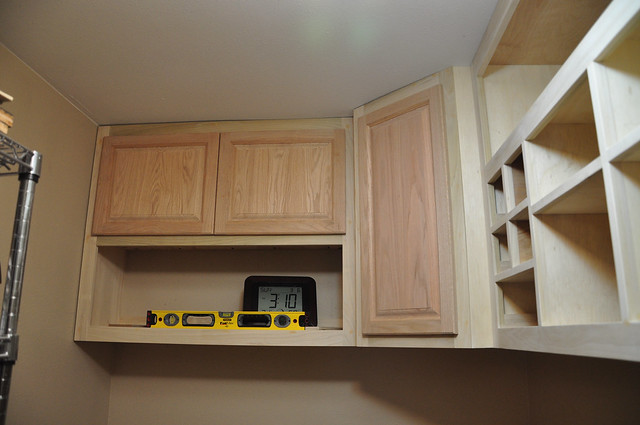
From my original plans, I knew I wanted a 2-tone look to my cabinets and desk. I stained all the doors, drawer fronts and desk top and painted the rest. The trick was finding the right 2 color stain/paint combo. I wanted it to be a classic style, but not too dark.

The big lesson learned with this step was patience. For a good finish, there are many steps, and each step is important.

Painting

Painting the shell
We chose a taupe color for the cabinets. The painting was fairly easy: 2 coats of primer, sanding between coats. 2 coats of paint. With the coats of primer and proper sanding, the final product was a smooth and durable finish.

Another extra step was to put a coat of Polyurethane inside the drawers and cabinets. Most skip this step, but since all sort of paint, glue and other things will be thrown around in this room, a little extra protection helps.


Monday, May 30, 2011

Art Room Project - Project Drawers

This is the tenth post in my Art Room Project series. Find the Table of Contents at the first post, Getting Started.

Project Drawers

A project drawer is used to organize project supplies: drawing, painting, sculpture, fly tying, or whatever I tackle in the future. I can remove them and set them aside while working, then slide them back to their cubby holes when finished. Organized and neat, like I like it.

This is a small box, made from 1/2" inch birch plywood with an oak front.


Thursday, March 10, 2011

Art Room Project - Cabinet Doors

This is the ninth post in my Art Room Project series. Find the Table of Contents at the first post, Getting Started.


Your Door is Ajar

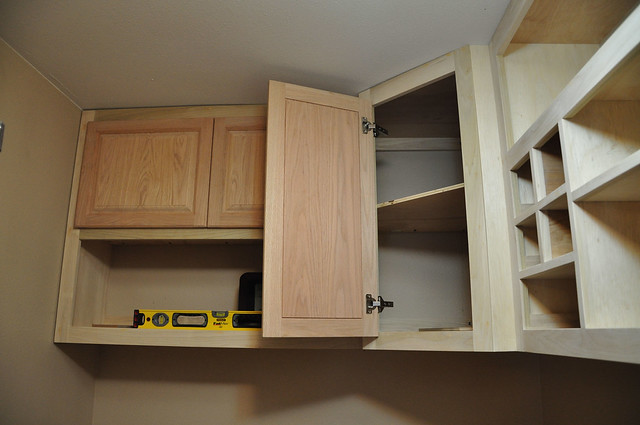
I built and hung my first set of doors. I'm happy to report my math worked. The doors cover the right amount of cabinet, 1/2" all around. They are relatively square, and meet close to the middle where required.

I splurged and bought the European style hinges, the fancy style with the six way adjustment, so that helped with how they fit. Plus, the hinges were super easy to install and hang. No trouble at all.

Here we are with the far set of cabinets. The red oak looks a little strange on the white poplar, but remember I'll be doing a two tone finish later.


Saturday, February 19, 2011

Art Room Project - Drawer Panels

This is the eighth post in my Art Room Project series. Find the Table of Contents at the first post, Getting Started.

Time for the Details

The bulk of the cabinets are made. Now we work on the details, starting with the drawer face panels.

Bits...

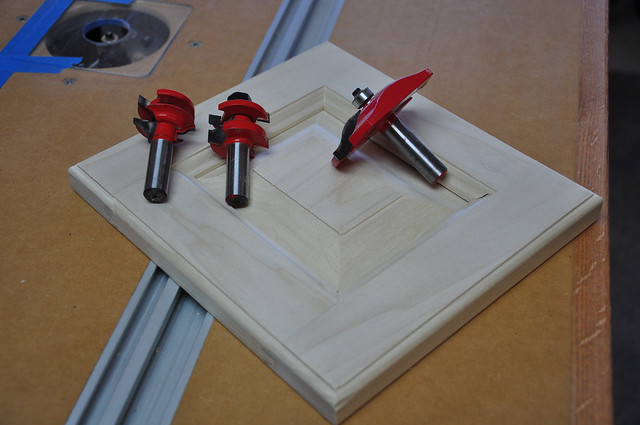
A friend, Andrew, let me borrow a set of door making bits for my router. These are heavy duty, 1/2" shank bits, designed to shape a lot of wood. I was a little intimidated by them at first, but after a few test runs and a couple of real panels I'm comfortable with the process. Any woodworker with a good router table and a little patience can make some great doors.


Saturday, January 22, 2011

Art Room Project - Upper Desk

This is the seventh post in my Art Room Project series. Find the Table of Contents at the first post, Getting Started.

Scratch the Surface

Now we are getting to some fun stuff: creating the desk top. This is the surface where I'll work, cut, paint, glue, scrape, bleed, etc. The issue, which I had not addressed until I got to this point, was what material to use for the top? It didn't seem important until now.

Top Type

During the design, I assumed it would be a Formica or other laminate top--maybe a pre-built one from the hardware stores and cut to fit. As I built the cabinets, this didn't feel right. I had all this custom work, only to drop in a kitchen top? So I talked to Teresa about my ideas. Maybe I should just make an oak top. I could even do end grain up, like a cutting board, so it would be tough and easy to sand and fix.

Saturday, January 8, 2011

Art Room Project - Lower Desk

This is the sixth post in my Art Room Project. Find the Table of Contents at the first post, Getting Started.

Work on the Work Area

Time to focus on the work area. I built the trash cabinet first. This holds up the lower desk on the left.

Trash Cabinet

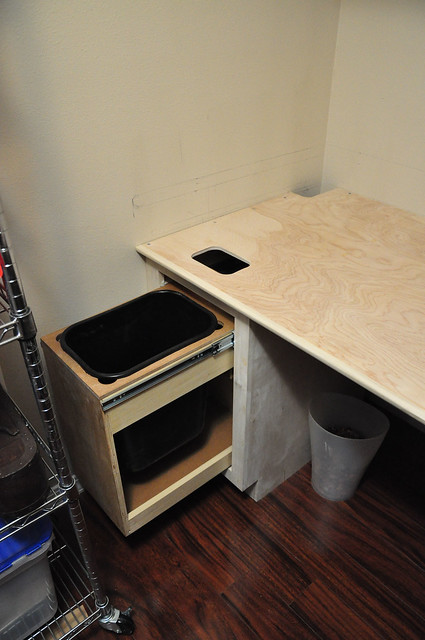
Having a trash can in a cabinet is nothing new. I looked at many pre-built options, but realized it is just a drawer turned upside down. Cut a hole for the bin, add some structure to the bottom and we have a good solution.

I used 100 lb rated drawer slides. If I'm throwing away more than 100 lbs in this little trash can, I have bigger issues than the drawer slide rating.

Here you can also see the lower desk installed. I cut a small hole so trash can be pushed in without needing to open the drawer.


Saturday, December 11, 2010

Art Room Project - Project Cabinets

This is the fifth post in my Art Room Project series. Find the Table of Contents at the first post, Getting Started.

Project Yourself

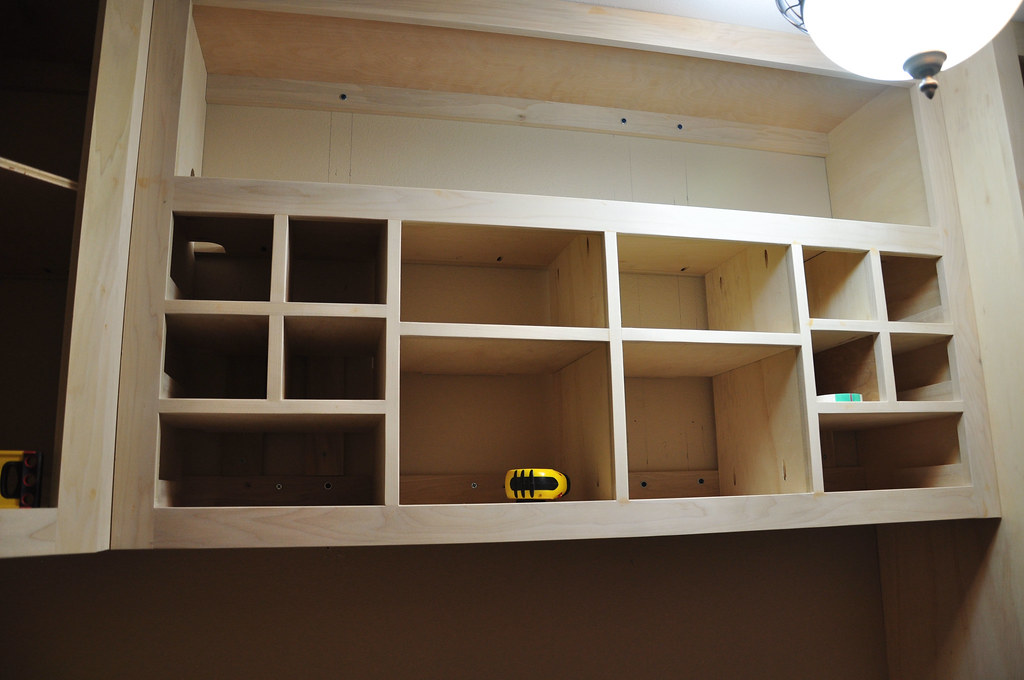
Now the corner and side cabinets are in, I can work on the project cabinets that span the two.

This was part of the project needing the tweaks I spoke about earlier. My SketchUp design expected certain distances between the two cabinets, but due to imperfect wall and wood measurements, the spacing was a little different. Not a problem. Just re-measure and design to fit.


Measuring Tricks

As you can see, there was a lot of measuring, but it wasn't too difficult. Instead of constantly relying on my tape measure, I just cut scrap wood to the regular sizes and used them to make sure it fit. This is like the 'story stick' method of measuring used by most woodworkers. (Nice story stick method video here.)

Another measuring trick I learned the hard way: Buy a good, accurate tape measure and only use that one tape measure for your real cuts. If you are like me, you might have 2 or 3 tape measures lying around, and you will be tempted to grab whatever is handy for a cut. Each tape measure, regardless of quality, has a degree of accuracy and slop in the measurements--even in the same brands. With woodworking, consistency is more important than accuracy. My tape measure may be off by 1/16", but if I use it everywhere, all my measurements will still be consistent and reliable.

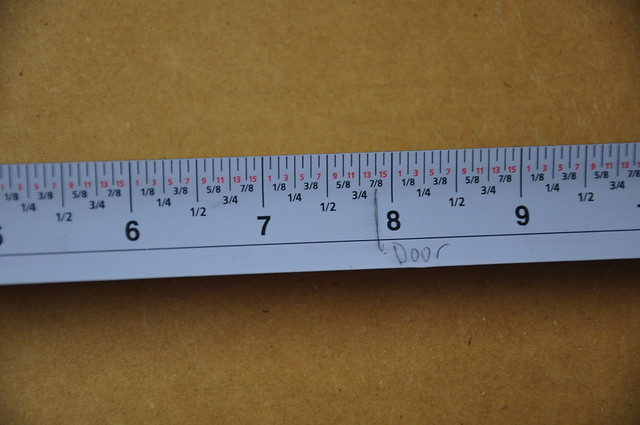
My Tape Measure

I don't get money from this tape manufacturer (I would gladly take it if they sponsored me), but I love this product. It is by a company called FastCap, and I use their Story Pole Tape measure.


What makes this tape unique is the markable surface. I can easily mark points on the tape with a pencil, and erase it later. The black on white with red 16ths are easy to read, and the lines are thin enough to feel accurate. Also, I'm still working on my fractional math, so having the fractions on the tape have been wonderful.

Would it be nice if the numbers were on both sides? Sure, but I've been able to work around any issues with it. Just flip the tape and read it upside down. No biggie.

I've had an issue with durability in the case, as the lock has broke, but this is after two years of constant use. I would easily recommend and buy this brand again.

Where to Spend Money

One can usually skimp and save money on most tools. Is a $10 screwdriver better than a $1.50 screwdriver? In some ways, yes, but they will both drive screws (at least for a while). With measuring tools, however, it is usually worth the extra money to get the higher quality. The money goes into insuring that measuring 16" is always accurate and easy to see, a square will always be 90 degrees or an angle always 45 degrees.

On some projects, a 91 degree right angle can be tolerated, but usually that 1 degree error, or fraction of an inch error, is multiplied over many pieces, creating an exponential problem.

Machinists live in a world of thousands of an inch tolerance. Woodworking is more forgiving, but when you can trust your equipment to a high tolerance, it makes building much more predictable and enjoyable.

Next Post: Lower Desk