Showing posts with label projects. Show all posts

Tuesday, August 28, 2012

Dead Gnome Pen Holder

dead gnome pen holder close up
Over the years, one homemade gift I give to family and friends is my Dead Gnome Pen holder. He's given his life to forever hold a pen. This is the latest version.
dead gnome pen holder
Normally I'd prime and paint an original and give it away. This time I made a mold and cast several copies. This post outlines the steps to making the mold, the cast to final painting.


Saturday, August 25, 2012

5 by 5 ACO Project

My latest project is doing a few paintings for the 5 by 5 exhibition which benefits our Arts Center of the Ozarks in Springdale.

ACO 5x5Every year, the ACO accepts donated art (limited to a 5" x 5" canvas or 5" x 5" x 5" three dimensional art) from local and regional artists. They auction off the works and all proceeds go the ACO.

This year the donations will be shown in their gallery from October 4th through November 8th, and will auction off the pieces November 8th from 6pm to 8pm via silent auction.

I thought it would be a fun challenge and get me back into painting Plus, the ACO is a great organization. Helping them, even in this small way, is a great cause.

Sunday, July 15, 2012

Art Room Project - Final

This is the twelfth post in my Art Room Project series. Find the Table of Contents at the first post, Getting Started.

Details

I installed the hardware. They are a pewter finish with a mixture of pulls and knobs. The contrasting silver pops against the deep red and black wood grain. I'm very happy with the results.

Also added a new overhead light. Had to move the electrical around a little, but no hassle if you've done it once or twice.

The only parts left on the room is finding the perfect chair, building some more hangings for the slatwall (see below), and organizing all my art crap in a meaningful way.


Monday, October 24, 2011

Art Room Project - Begin the Finish

This is the eleventh post in my Art Room Project series. Find the Table of Contents at the first post, Getting Started.

The Finish

From my original plans, I knew I wanted a 2-tone look to my cabinets and desk. I stained all the doors, drawer fronts and desk top and painted the rest. The trick was finding the right 2 color stain/paint combo. I wanted it to be a classic style, but not too dark.

The big lesson learned with this step was patience. For a good finish, there are many steps, and each step is important.

Painting

Painting the shell
We chose a taupe color for the cabinets. The painting was fairly easy: 2 coats of primer, sanding between coats. 2 coats of paint. With the coats of primer and proper sanding, the final product was a smooth and durable finish.

Another extra step was to put a coat of Polyurethane inside the drawers and cabinets. Most skip this step, but since all sort of paint, glue and other things will be thrown around in this room, a little extra protection helps.


Monday, May 30, 2011

Art Room Project - Project Drawers

This is the tenth post in my Art Room Project series. Find the Table of Contents at the first post, Getting Started.

Project Drawers

A project drawer is used to organize project supplies: drawing, painting, sculpture, fly tying, or whatever I tackle in the future. I can remove them and set them aside while working, then slide them back to their cubby holes when finished. Organized and neat, like I like it.

This is a small box, made from 1/2" inch birch plywood with an oak front.


Thursday, March 10, 2011

Art Room Project - Cabinet Doors

This is the ninth post in my Art Room Project series. Find the Table of Contents at the first post, Getting Started.


Your Door is Ajar

I built and hung my first set of doors. I'm happy to report my math worked. The doors cover the right amount of cabinet, 1/2" all around. They are relatively square, and meet close to the middle where required.

I splurged and bought the European style hinges, the fancy style with the six way adjustment, so that helped with how they fit. Plus, the hinges were super easy to install and hang. No trouble at all.

Here we are with the far set of cabinets. The red oak looks a little strange on the white poplar, but remember I'll be doing a two tone finish later.


Saturday, February 19, 2011

Art Room Project - Drawer Panels

This is the eighth post in my Art Room Project series. Find the Table of Contents at the first post, Getting Started.

Time for the Details

The bulk of the cabinets are made. Now we work on the details, starting with the drawer face panels.

Bits...

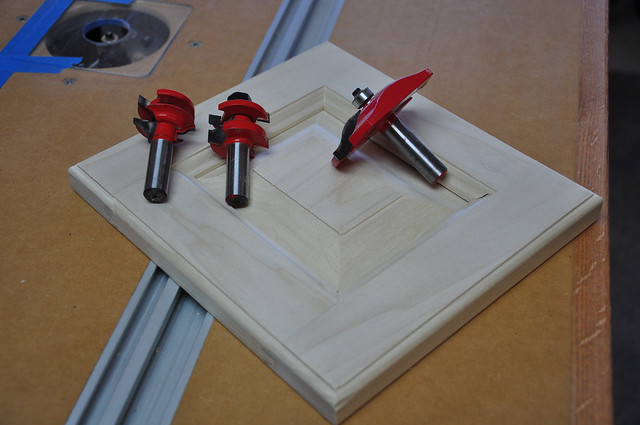
A friend, Andrew, let me borrow a set of door making bits for my router. These are heavy duty, 1/2" shank bits, designed to shape a lot of wood. I was a little intimidated by them at first, but after a few test runs and a couple of real panels I'm comfortable with the process. Any woodworker with a good router table and a little patience can make some great doors.


Saturday, January 22, 2011

Art Room Project - Upper Desk

This is the seventh post in my Art Room Project series. Find the Table of Contents at the first post, Getting Started.

Scratch the Surface

Now we are getting to some fun stuff: creating the desk top. This is the surface where I'll work, cut, paint, glue, scrape, bleed, etc. The issue, which I had not addressed until I got to this point, was what material to use for the top? It didn't seem important until now.

Top Type

During the design, I assumed it would be a Formica or other laminate top--maybe a pre-built one from the hardware stores and cut to fit. As I built the cabinets, this didn't feel right. I had all this custom work, only to drop in a kitchen top? So I talked to Teresa about my ideas. Maybe I should just make an oak top. I could even do end grain up, like a cutting board, so it would be tough and easy to sand and fix.

Saturday, January 8, 2011

Art Room Project - Lower Desk

This is the sixth post in my Art Room Project. Find the Table of Contents at the first post, Getting Started.

Work on the Work Area

Time to focus on the work area. I built the trash cabinet first. This holds up the lower desk on the left.

Trash Cabinet

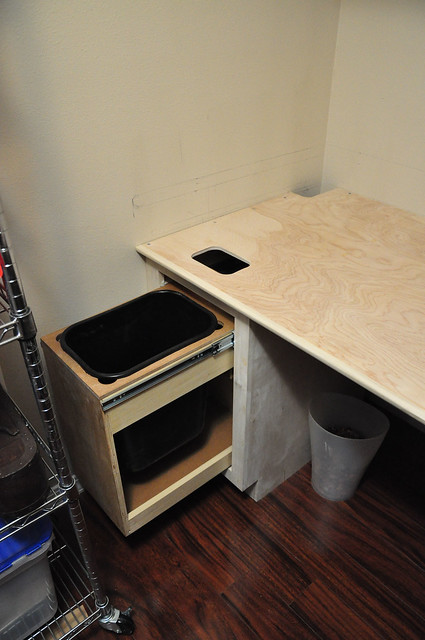
Having a trash can in a cabinet is nothing new. I looked at many pre-built options, but realized it is just a drawer turned upside down. Cut a hole for the bin, add some structure to the bottom and we have a good solution.

I used 100 lb rated drawer slides. If I'm throwing away more than 100 lbs in this little trash can, I have bigger issues than the drawer slide rating.

Here you can also see the lower desk installed. I cut a small hole so trash can be pushed in without needing to open the drawer.


Saturday, December 11, 2010

Art Room Project - Project Cabinets

This is the fifth post in my Art Room Project series. Find the Table of Contents at the first post, Getting Started.

Project Yourself

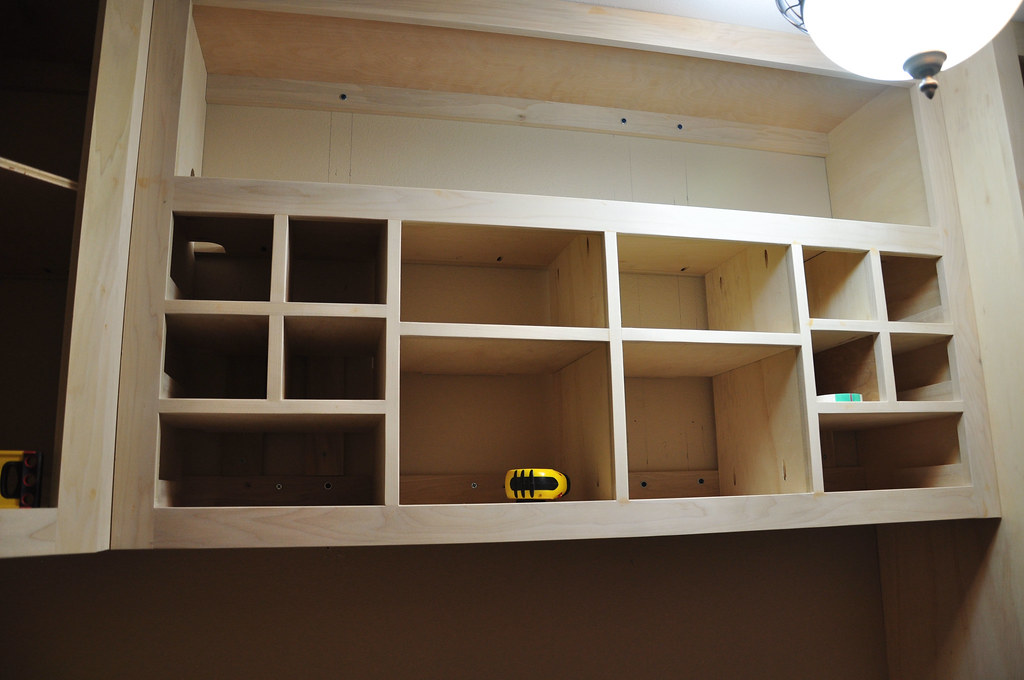
Now the corner and side cabinets are in, I can work on the project cabinets that span the two.

This was part of the project needing the tweaks I spoke about earlier. My SketchUp design expected certain distances between the two cabinets, but due to imperfect wall and wood measurements, the spacing was a little different. Not a problem. Just re-measure and design to fit.


Measuring Tricks

As you can see, there was a lot of measuring, but it wasn't too difficult. Instead of constantly relying on my tape measure, I just cut scrap wood to the regular sizes and used them to make sure it fit. This is like the 'story stick' method of measuring used by most woodworkers. (Nice story stick method video here.)

Another measuring trick I learned the hard way: Buy a good, accurate tape measure and only use that one tape measure for your real cuts. If you are like me, you might have 2 or 3 tape measures lying around, and you will be tempted to grab whatever is handy for a cut. Each tape measure, regardless of quality, has a degree of accuracy and slop in the measurements--even in the same brands. With woodworking, consistency is more important than accuracy. My tape measure may be off by 1/16", but if I use it everywhere, all my measurements will still be consistent and reliable.

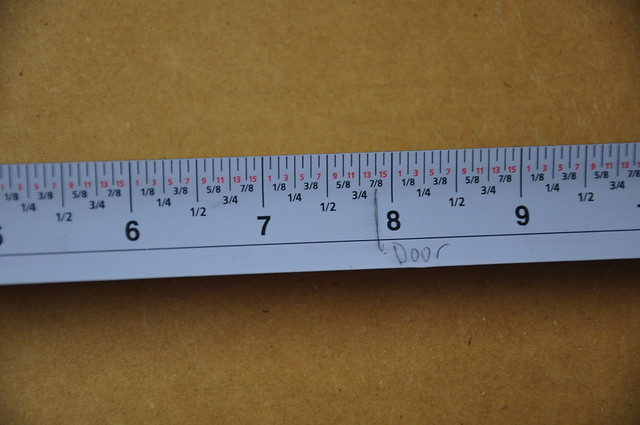
My Tape Measure

I don't get money from this tape manufacturer (I would gladly take it if they sponsored me), but I love this product. It is by a company called FastCap, and I use their Story Pole Tape measure.


What makes this tape unique is the markable surface. I can easily mark points on the tape with a pencil, and erase it later. The black on white with red 16ths are easy to read, and the lines are thin enough to feel accurate. Also, I'm still working on my fractional math, so having the fractions on the tape have been wonderful.

Would it be nice if the numbers were on both sides? Sure, but I've been able to work around any issues with it. Just flip the tape and read it upside down. No biggie.

I've had an issue with durability in the case, as the lock has broke, but this is after two years of constant use. I would easily recommend and buy this brand again.

Where to Spend Money

One can usually skimp and save money on most tools. Is a $10 screwdriver better than a $1.50 screwdriver? In some ways, yes, but they will both drive screws (at least for a while). With measuring tools, however, it is usually worth the extra money to get the higher quality. The money goes into insuring that measuring 16" is always accurate and easy to see, a square will always be 90 degrees or an angle always 45 degrees.

On some projects, a 91 degree right angle can be tolerated, but usually that 1 degree error, or fraction of an inch error, is multiplied over many pieces, creating an exponential problem.

Machinists live in a world of thousands of an inch tolerance. Woodworking is more forgiving, but when you can trust your equipment to a high tolerance, it makes building much more predictable and enjoyable.

Next Post: Lower Desk

Saturday, December 4, 2010

Art Room Project - Side Cabinets

This is the fourth post in my Art Room Project series. Find the Table of Contents at the first post, Getting Started.

Side to Side

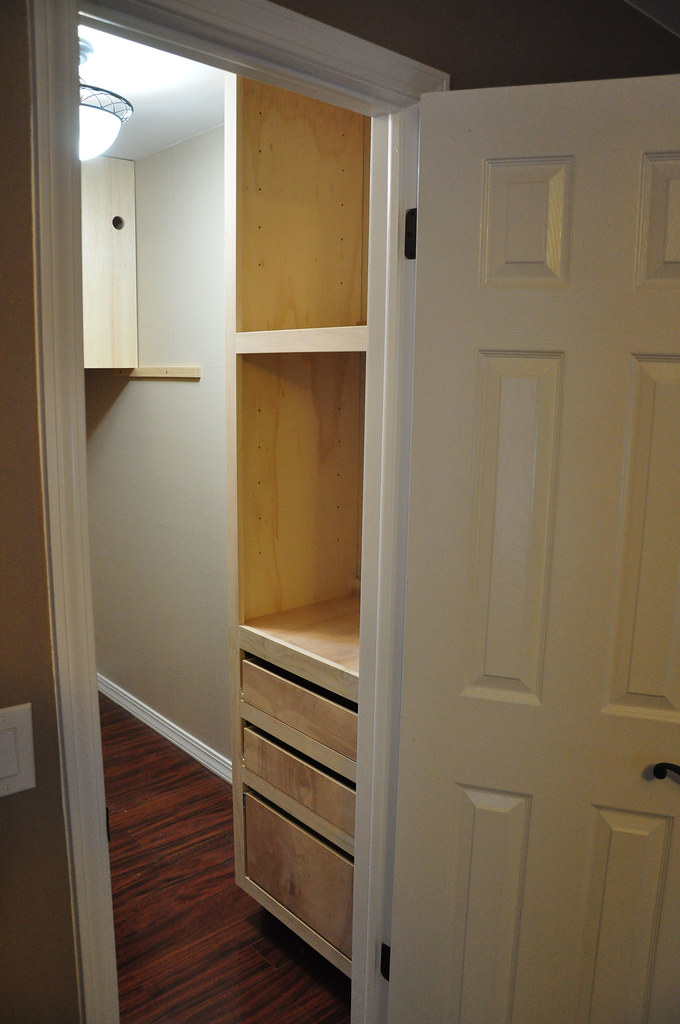
Next we have the side cabinets. Here they are installed.

Since the cabinet goes floor to ceiling, I had to make them in two parts, the lower drawers made first and installed, then the top shelves built on last.

The top will have adjustable shelves I will install later.

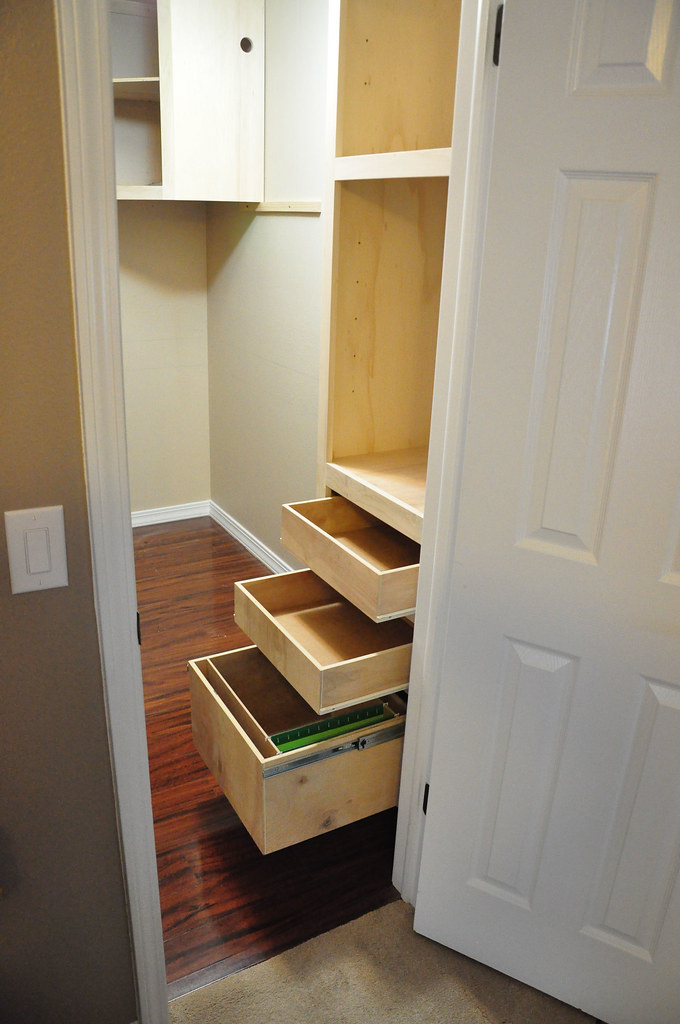
Drawers

The drawers are basic. I built the bottom drawer to handle hanging files if needed. I'll be adding doors and drawer fronts later.

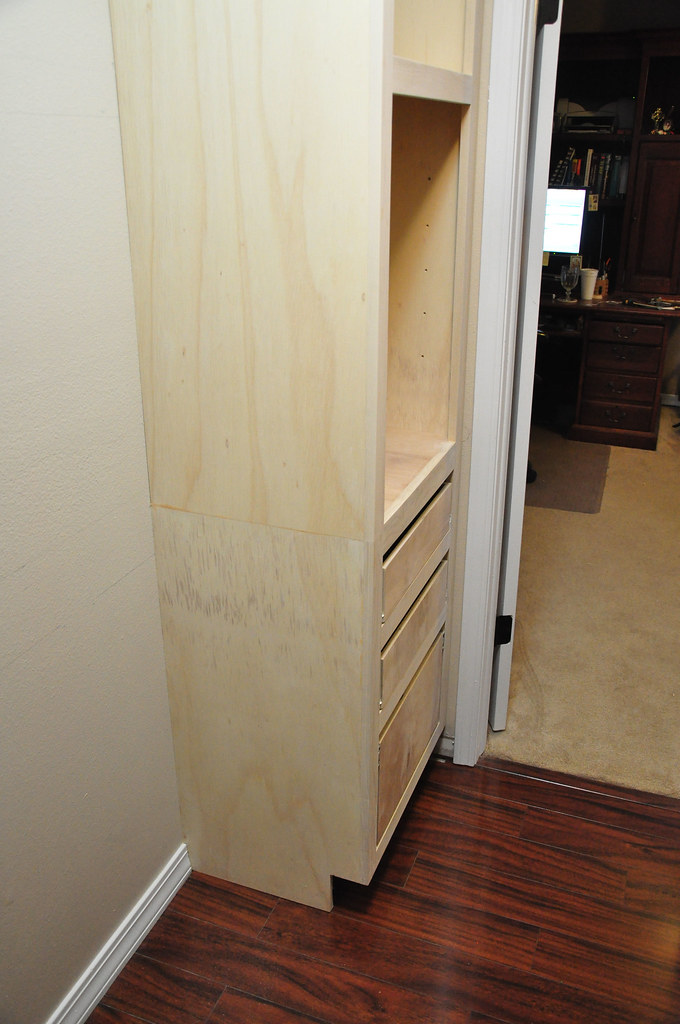
See the Seam (not)

The view from the inside shows the seam where the top and bottom cabinets meet. I put the seam where the desk top will line up, so the seam won't be visible.

Now I have the anchor cabinets in the room, it is time to build around them.

Next Post: Project Cabinets

Saturday, November 20, 2010

Art Room Project - Upper Cabinets

This post is third in a series outlining my Art Room Project. Find the Table of Contents at the first post, Getting Started.

Time to Build

I've never built a cabinet before. The most I've made to this point are some small shelves and cubby holes for a closet. Before I started cutting, however, I felt confident I would be successful, mostly because of my work in SketchUp doing the designs. I already built the entire project digitally. I knew what size every board and panel should be and where they should go.

Materials

I wanted to use materials easy to find (and replace if I screw up) in my area, so I decided on a motley mixture of Birch plywood (3/4" and 1/2") for cabinet carcass, 3/4" poplar for face frame and trim, and 3/4" red oak for doors and drawer fronts. Since I planned on the two-tone look, I could get away with mixing the wood types.

Expected Issues

The only issues I had to overcome were the reality issues all carpenters must master, such as: walls not being level, rooms not being square, not all 3/4" boards being 3/4", seasonal wood sizing, etc. In my little experience, I knew I had to work around these problems rather than trying to solve them. The best way to do this was to build in stages, starting with the immutable parts first, and adapt where I could.


Start in the Corner

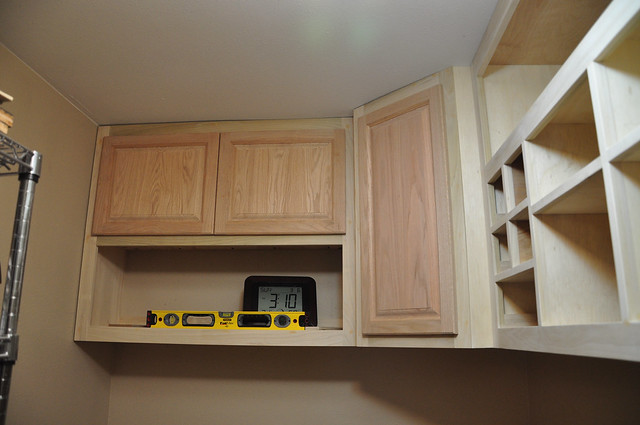
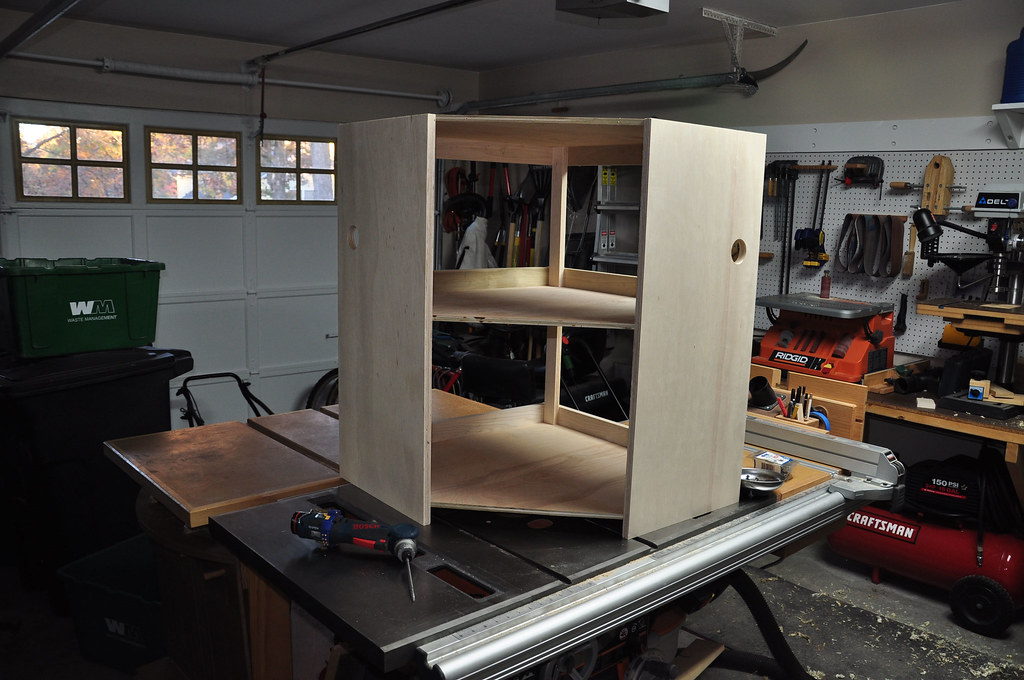
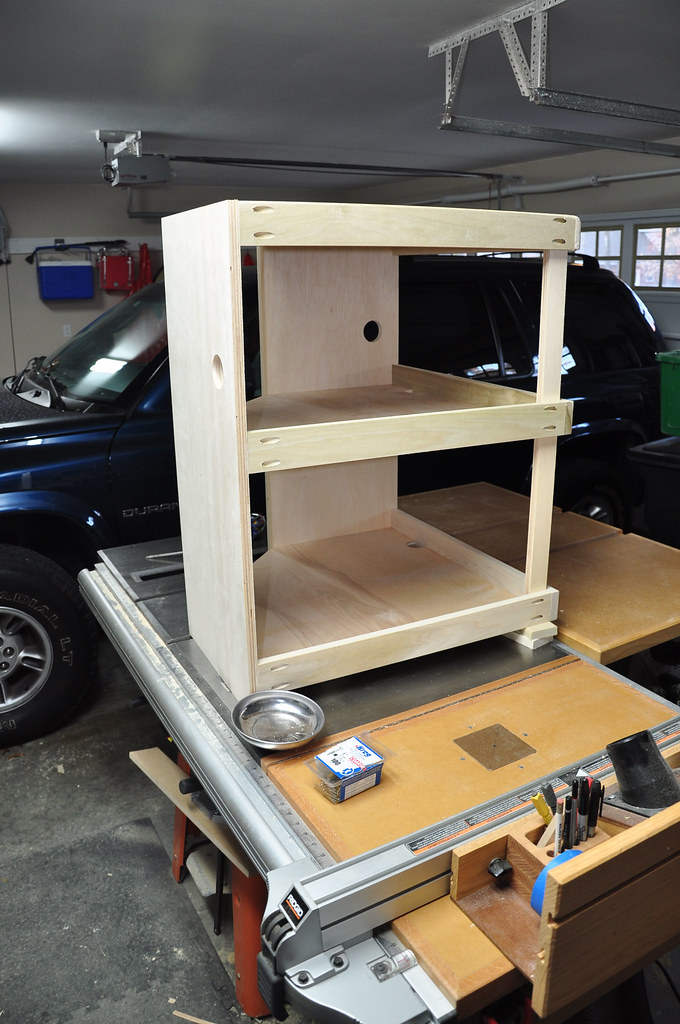
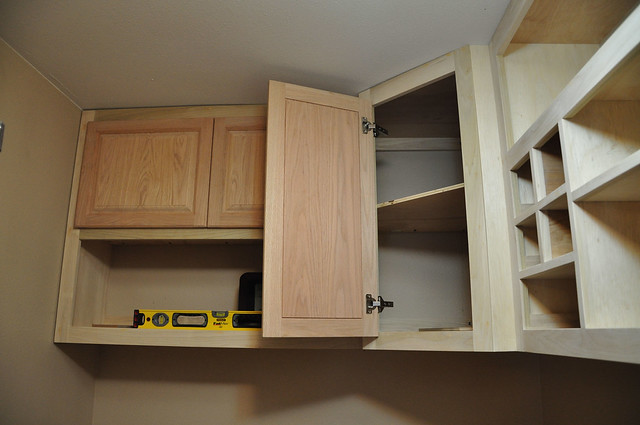
I started with the top corner cabinet for this reason. It was big and bulky and it's shape couldn't be adapted easily, whereas the shelves could easily be adjusted to fit the remaining space.

The basic corner cabinet was relatively easy. The holes in the side and selves are for under cabinet lighting and wiring options later.

Hang Time

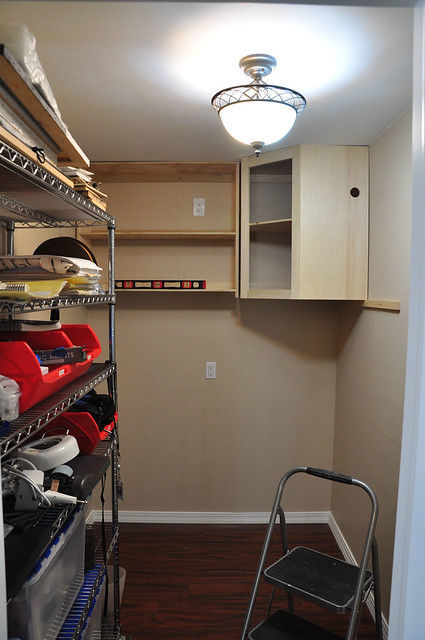
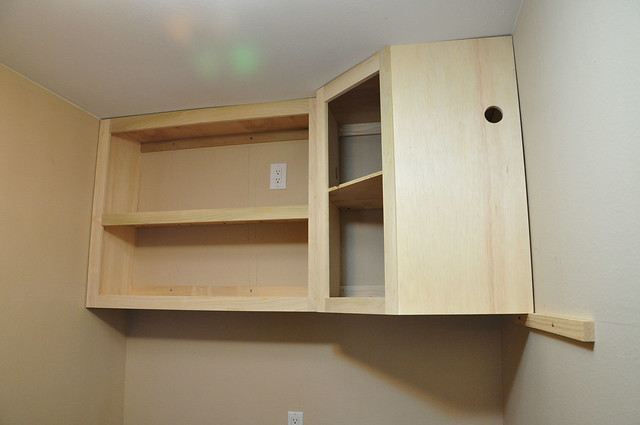
And now it is time to install. Corner cabinet up first, then I checked the measurements for the shelves and adjusted accordingly.

We're off to a good start! Everything is level and secure. The face frame is on. Time to move to the big, side cabinet next.

Next Post: Side Cabinets

Saturday, November 13, 2010

Art Room Project - Plans

This is the second post in my Art Room Project. Find the Table of Contents at the first post, Getting Started.

Decide to Design

I had many options to fill this small room and make it useful. I could just buy a desk and put up shelves, hire a cabinet maker to design and build, or continue to use the card table and wire shelves already in there. Once I decided to do the designing and building myself (carpentry is yet another hobby), I had to have a good way to visualize what I wanted.

SketchUp

I studied many design applications and chose Google SketchUp. The application is free, easy to use, and after going through all their tutorials and some testing on my own, I felt SketchUp would work great. With some minor setup, it can be adapted to do woodworking plans.

Note: Fine Woodworking has an entire blog on the SketchUp here.

Requirements

My requirements were fairly simple:
  • Plenty of storage - with most items being small.
  • Plenty of desk space - room to spread out.
  • Standing and sitting working height.
  • Plenty of light, ambient and task.
  • Places to attach more lights and magnifiers for detail work.
  • Adaptable area to fit different project types and ways to organize for future projects.
After many designs and false starts, I finally decided on the following:

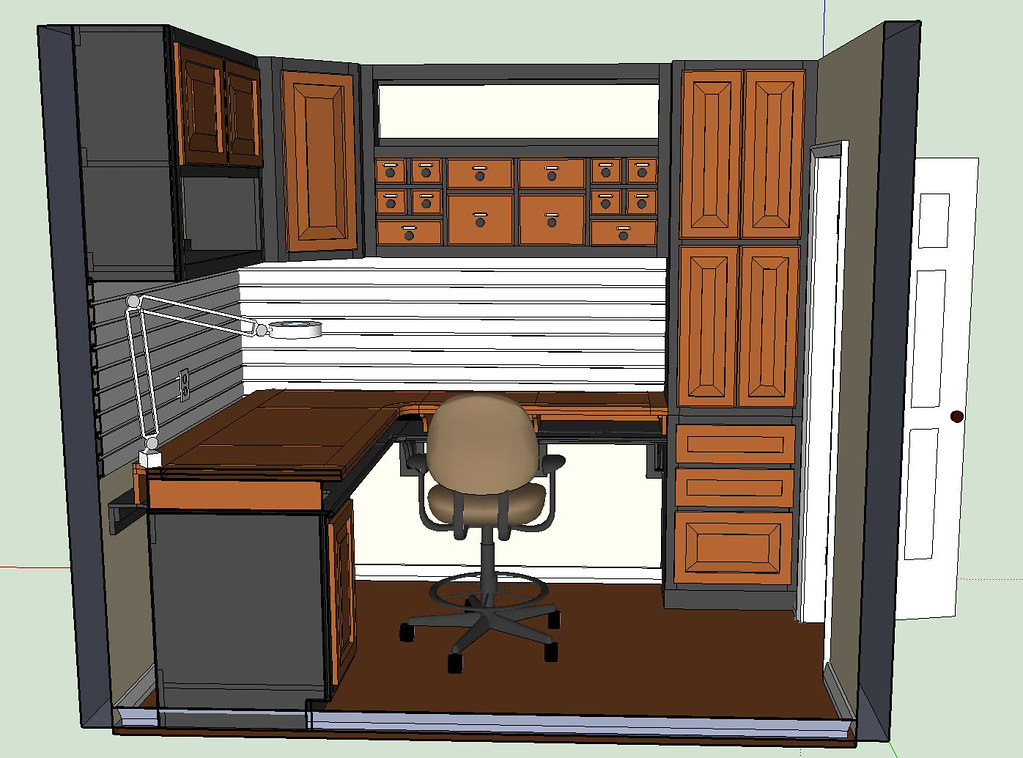
Side View, with left wall invisible.

It shows the upper cabinet with open shelves, a corner cabinet, and smaller project drawers. These drawers can be easily removed when in use. I call them my "Project Drawers" because I plan on keeping like things in each drawer. For example, when painting, I'll pull out the paint drawers with all the paints and supplies, put them on the desk and work away.

Another detail is in the desk. It doesn't go all the way back on the large side. There is a 3.5" gap to the wall where it drops down to the lower desk below. I took this idea from old wood working benches with the tool trough. I can put an electrical strip there and run wires under the main desk top. I can also put in any organizers I might need.

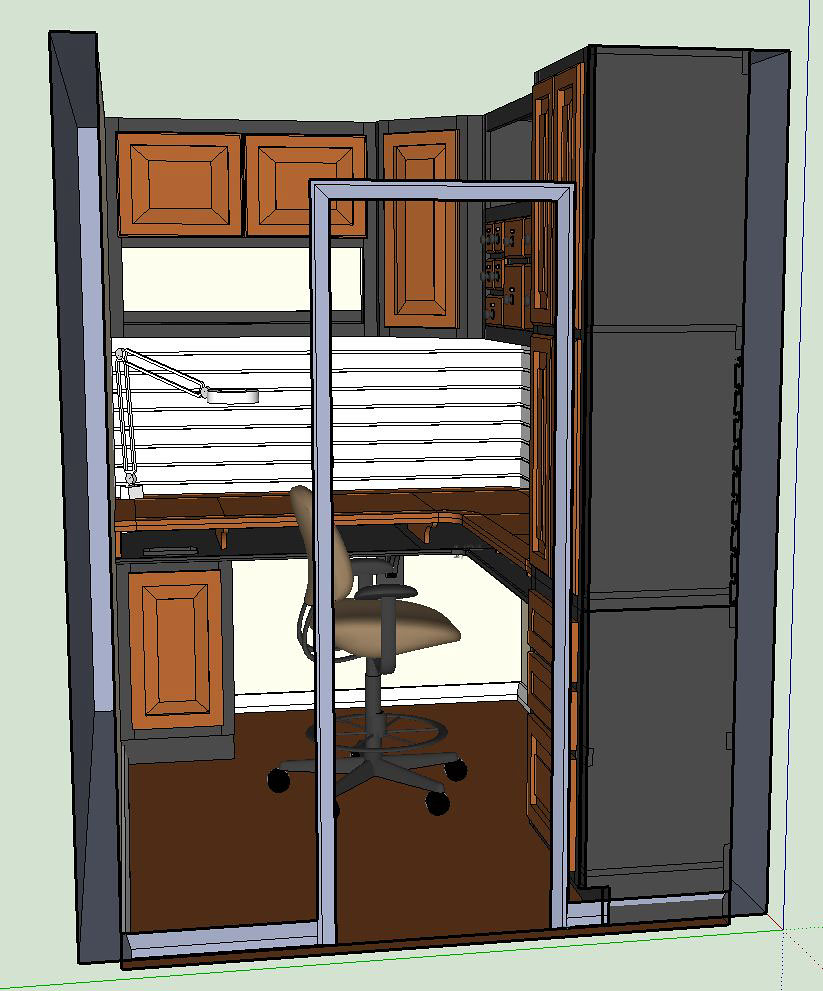
Front View, with wall invisible.

The desk is a double layer, with about a 3" gap. This is for flat file storage, running wires and other things. There is slatwall between the desk and upper cabinets so I can hang shelves or other organizers. The small cabinet on the left holds a trash can.


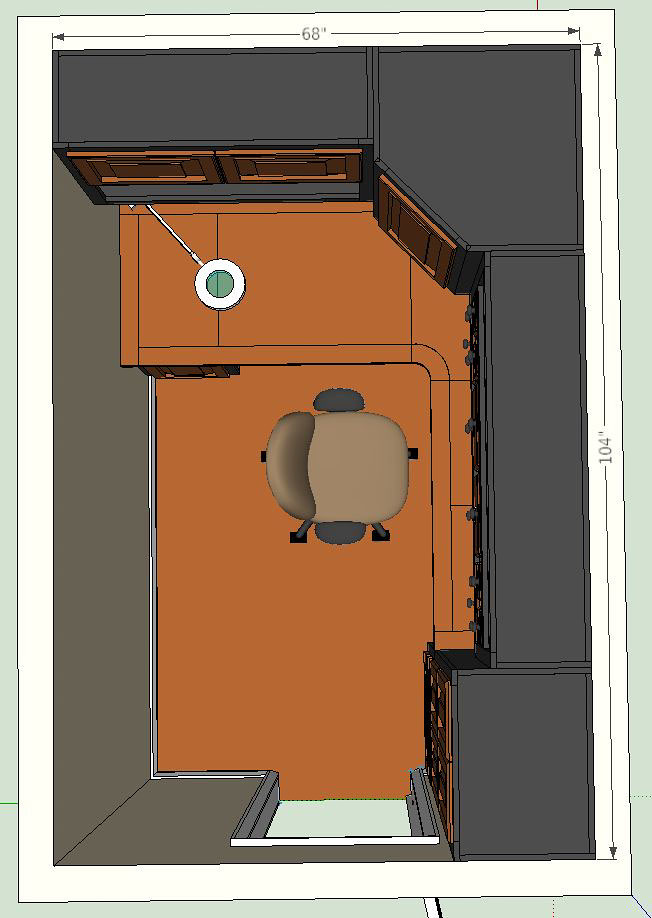
Top View


This is the view from the ceiling. There is plenty of space to move around and still have enough storage.

Now that the plan is set, I'm ready to start building!

Next Post: Upper Cabinets

Saturday, November 6, 2010

Art Room Project - Getting Started

Art Room Project Series


This is the first post in a series taking you through a cabinet building project I've worked on. The Table of Contents of the series:

  1. Getting Started - You are here.
  2. Design and Plans
  3. Upper Cabinets
  4. Side Cabinets
  5. Project Cabinets
  6. Lower Desk
  7. Upper Desk
  8. Drawer Panels
  9. Cabinet Doors
  10. Project Drawers
  11. Protect and Finish
  12. Final Details

Introduction

I'm lucky to have a home office which is a second Master bedroom. It is big with plenty of windows, double doors to the back patio, a full bathroom, and an utterly useless walk-in closet. It is too large for storage, but too small to be its own room. Its size is roughly 5.5' x 9.5' with normal 8' ceilings.

Repurpose Room

Those who know me know my hobby is having hobbies, so I wanted to convert this space to a workable area to hold all the fiddly bits for painting, sculpture, fly tying and whatever else I tackle. It was easy to imagine the area as a large, work cubicle with a desk and storage cabinets. The task for me was to design and build this cubicle.

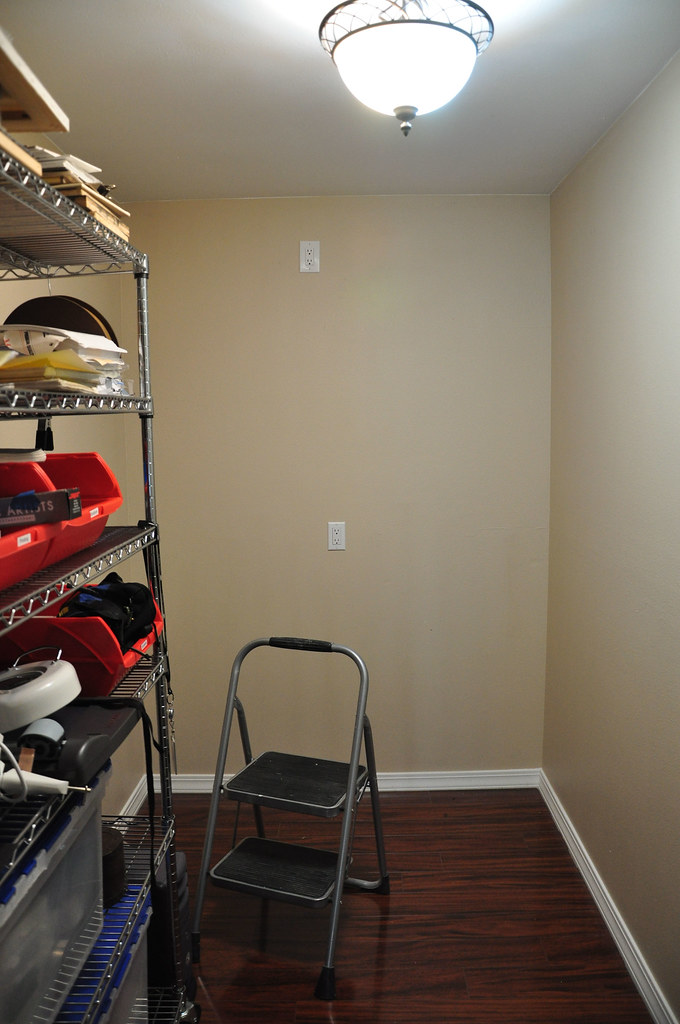
Starting Space
Here's a picture of the space before I started. The wire shelves will be removed when finished. Now it holds all the crap I'm trying to hide/organize with these new cabinets.

I added an outlet near the ceiling for under cabinet lights. More on that later.

Over the next few posts I'll report my progress and mention anything interesting I learn.

Next Post: Design and Plans.