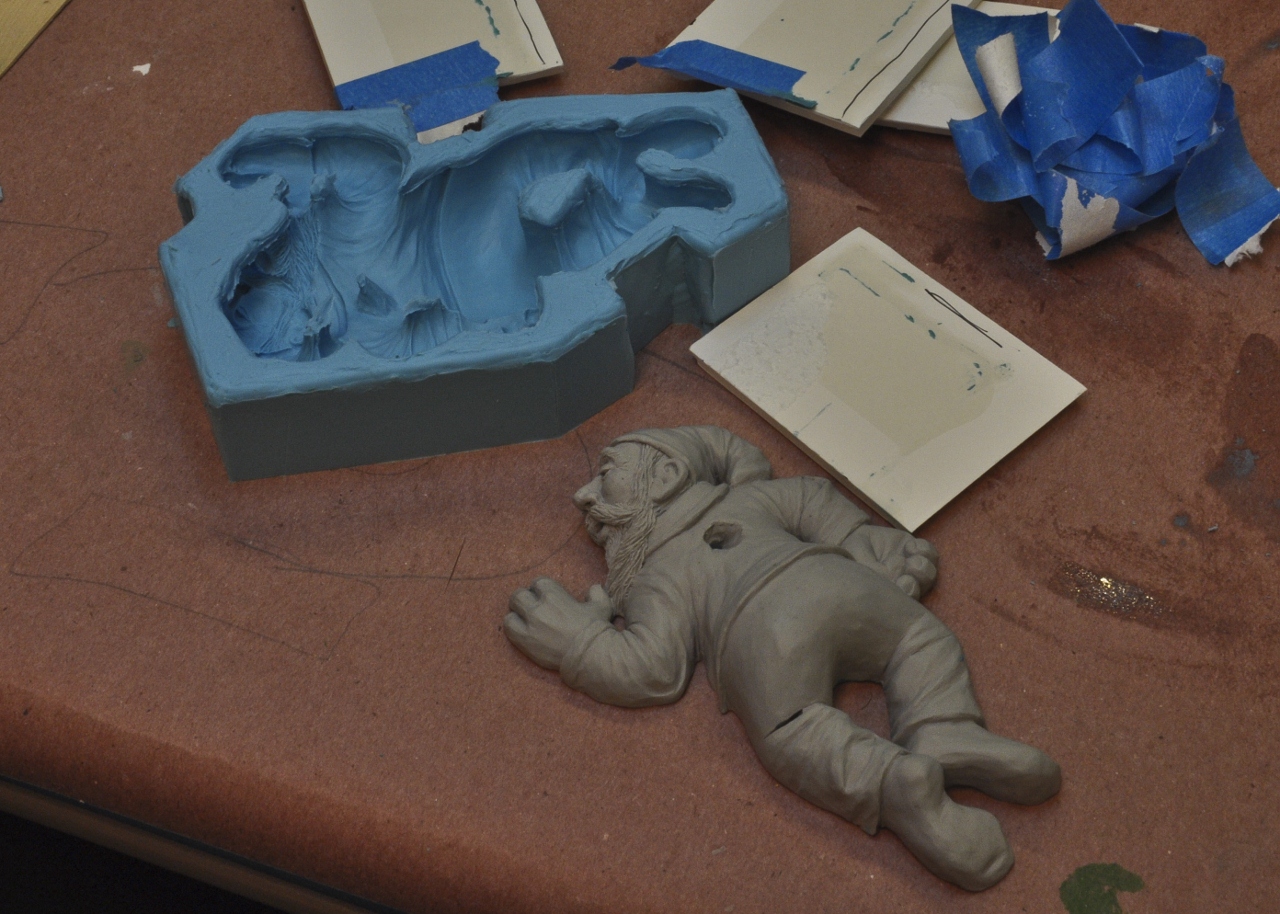
Tuesday, August 28, 2012

Dead Gnome Pen Holder

dead gnome pen holder close up
Over the years, one homemade gift I give to family and friends is my Dead Gnome Pen holder. He's given his life to forever hold a pen. This is the latest version.
dead gnome pen holder
Normally I'd prime and paint an original and give it away. This time I made a mold and cast several copies. This post outlines the steps to making the mold, the cast to final painting.


No Place Like Gnome


dead gnome pen holder original
The original sculpture I made from Sculpey. It's a polymer clay that stays soft until baked in the oven. Using some tools and imagination, I created this little guy.
dead gnome pen holder original back
This part takes maybe 8 or 10 hours, depending on how much I fiddle with the details. Then he's in the oven and ready for the next steps.


Mold Me

dead gnome pen holder mold making
Since our gnome lies flat, I only need a one part mold. Since the silicone I'm using is sturdy, I don't need a mother mold (plaster casing to hold the silicone).

The first step is to make a base of Klean Klay. It is a non-hardening clay that isn't affected by silicone. I use this to make the bottom of the mold and to fill in any blank areas to save on silicone.

dead gnome pen holder mold making
The walls are basic foam core with blue masking tape to seal the seams. The idea is to create a water-tight box with enough space to make a solid mold, but small enough not to waste anything.


dead gnome pen holder mold making release
Before preparing the silicone, a release spray is needed. A thin coat on the sculpture keeps the silicone from sticking.

The silicone I like is a simple 2-part mixture, much like an epoxy. Mix and pour and in 10 minutes we have a durable and flexible mold.

dead gnome pen holder mold
My original gnome broke his legs getting out of the rubber, but a little super glue and patch up and he's ready for future molds.


A Cast of Six

dead gnome pen holder casting
The casting can be done with just about anything: plaster, wax, plastic. I used a polyurethane plastic. It mixes and pours easily. Cures in 10 minutes and best of all no bubbles.  

dead gnome pen holder casting
I only had enough resin for a cast of six, and they are quick and easy to make. This is the easiest part of the whole process.

They even come out warm, like fresh cookies. The chemical process causes it to heat up as it cures.

Primed and Ready (to paint)

dead gnome pen holder primer
Like anything fresh, the gnomes need a coat of primer. The primer sticks to the plastic. The paint sticks to the primer. Everyone is happy.

dead gnome pen holder painted
I paint the gnomes with basic acrylics. I start with dark colors as a base coat and add on lighter colors until the final dry brush of highlights. This technique gives it an older, antique feel.

dead gnome pen holder paint details
After the acrylics are cured (few days), I spray on a protective coat of clear varnish. Our dead gnome is done!

I've given away a few as gifts already. I'm thinking of making some more and selling them.


No comments:

Post a Comment