
Decide to Design
I had many options to fill this small room and make it useful. I could just buy a desk and put up shelves, hire a cabinet maker to design and build, or continue to use the card table and wire shelves already in there. Once I decided to do the designing and building myself (carpentry is yet another hobby), I had to have a good way to visualize what I wanted.
SketchUp
I studied many design applications and chose Google SketchUp. The application is free, easy to use, and after going through all their tutorials and some testing on my own, I felt SketchUp would work great. With some minor setup, it can be adapted to do woodworking plans.
Note: Fine Woodworking has an entire blog on the SketchUp here.
Requirements
My requirements were fairly simple:
- Plenty of storage - with most items being small.
- Plenty of desk space - room to spread out.
- Standing and sitting working height.
- Plenty of light, ambient and task.
- Places to attach more lights and magnifiers for detail work.
- Adaptable area to fit different project types and ways to organize for future projects.
After many designs and false starts, I finally decided on the following:
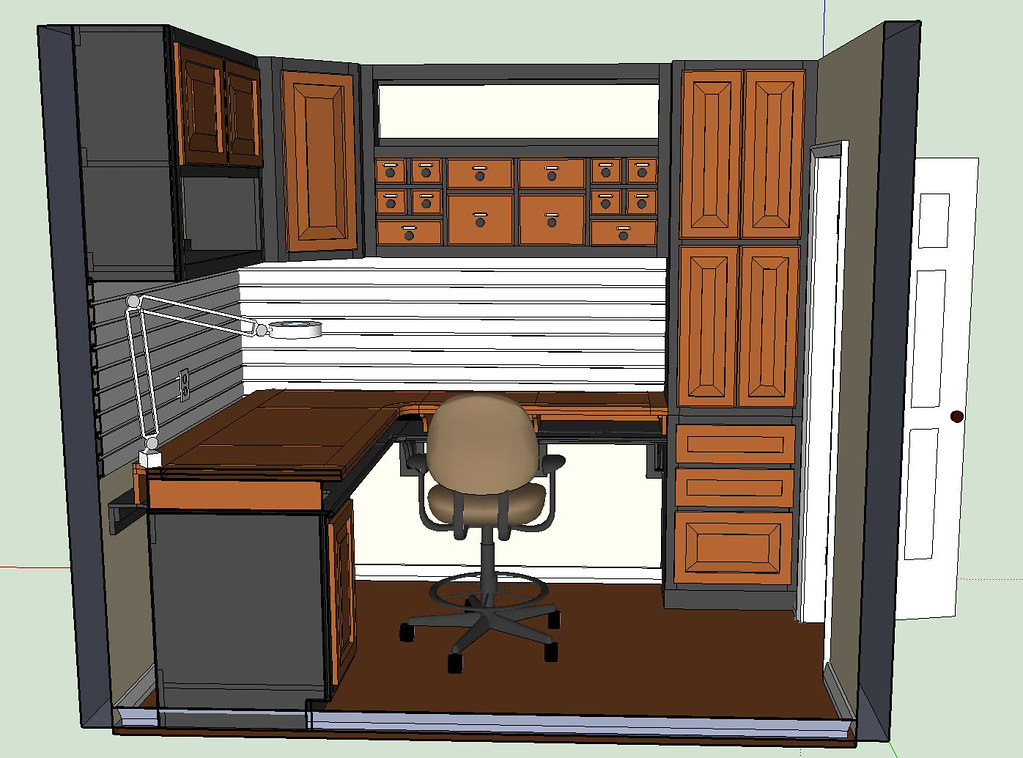
It shows the upper cabinet with open shelves, a corner cabinet, and smaller project drawers. These drawers can be easily removed when in use. I call them my "Project Drawers" because I plan on keeping like things in each drawer. For example, when painting, I'll pull out the paint drawers with all the paints and supplies, put them on the desk and work away.
Another detail is in the desk. It doesn't go all the way back on the large side. There is a 3.5" gap to the wall where it drops down to the lower desk below. I took this idea from old wood working benches with the tool trough. I can put an electrical strip there and run wires under the main desk top. I can also put in any organizers I might need.
The desk is a double layer, with about a 3" gap. This is for flat file storage, running wires and other things. There is slatwall between the desk and upper cabinets so I can hang shelves or other organizers. The small cabinet on the left holds a trash can.
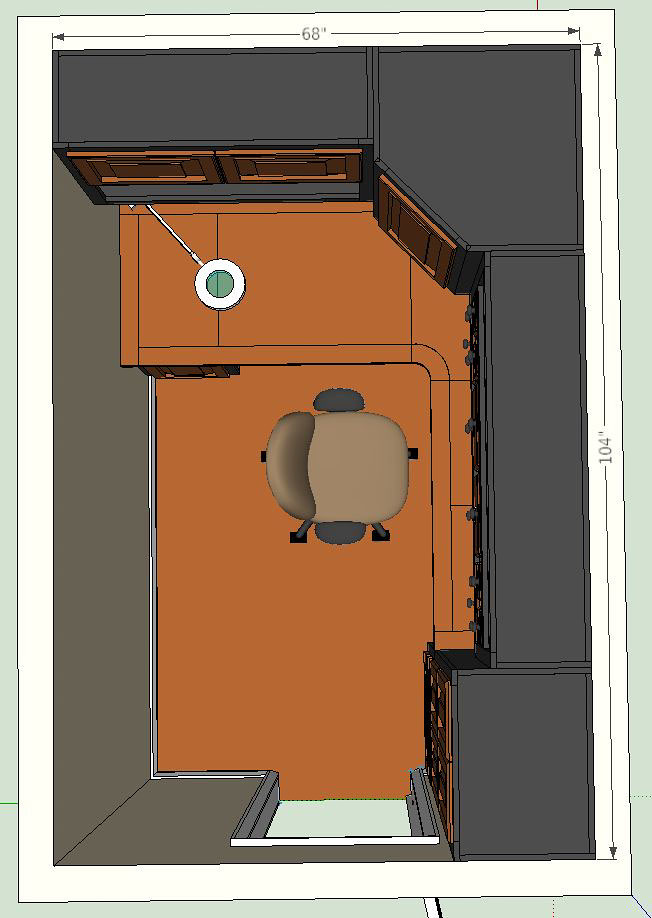
This is the view from the ceiling. There is plenty of space to move around and still have enough storage.
Now that the plan is set, I'm ready to start building!
Next Post: Upper Cabinets
No comments:
Post a Comment